Problem:
Sometimes you need to collect additional information on an Keap Max Classic order form (above and beyond what Keap Max Classic gives you).
Maybe you want to send a T-shirt to your client after their order and you need to know what size they wear, or you want your client to create their own password before checkout (this comes with other additional steps not outlined in this blog post), or maybe you just want to gather the client’s website address or birthday.
You can’t currently collect any of this information on an order form without some additional setup. So we have a couple of solutions for you.
If you need to add a terms and conditions checkbox, check out this post.
Solution 1 (very technical): Add additional or custom fields directly to an Keap Max Classic order form
Initials steps for adding each of the following custom items:
- In the order form builder, select the HTML Areas tab.
- Paste your HTML code (we will provide code below)in the “Product Information” box and click “Save”.
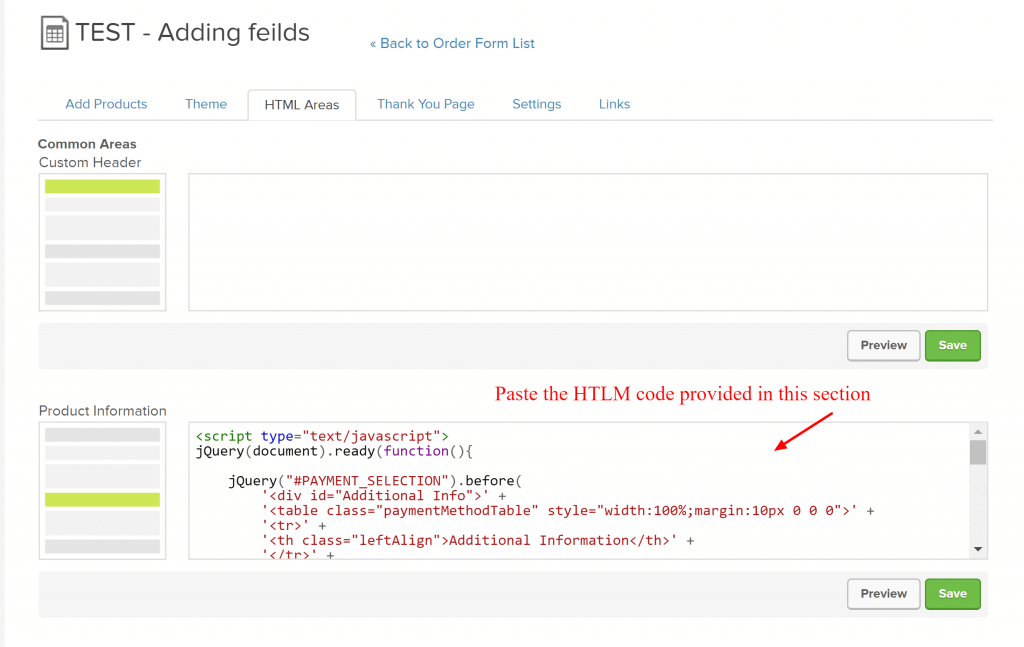
- Click “Preview” to see your changes or toggle over the “Links” tab and click on the URL. ( You may need to clear your cache or open the order form in an incognito window to view the changes immediately. )

Adding custom fields:
- Click the link below to get the HTML code for adding an additional field section and custom field (fields that you created, not existing Keap Max Classic fields) that contacts are required to fill in before placing their order. You will need to update the text that is in highlighted in green with the field names and your label.
Code for Adding Custom Text Fields to Keap Max Classic Order Forms
Code for Adding Custom Dropdown Fields to Keap Max Classic Order Forms
- To find the database name of a custom field, navigate to the Custom Field settings in Keap Max Classic (Admin > Settings; click “Go” next to where it says “Contact”)
- Click on the link above the custom field box that says “ View the field database names (for the API)"
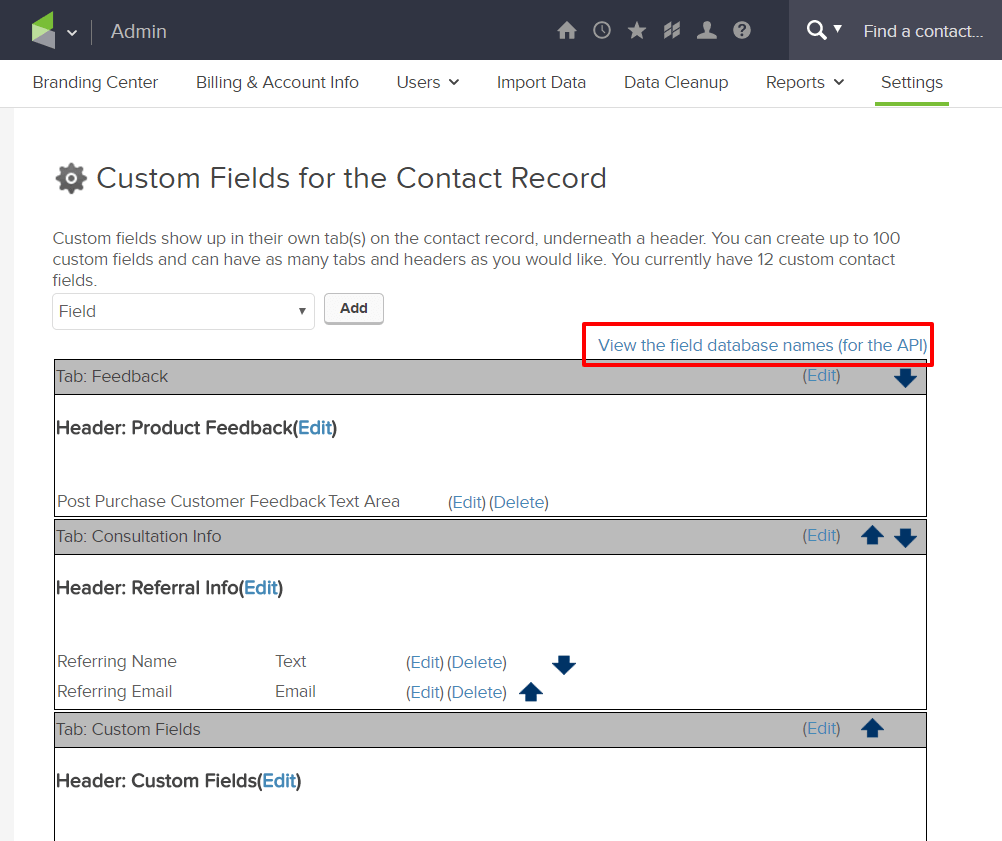

Scroll down to the field you want to use, and copy the name in the Database Name column.
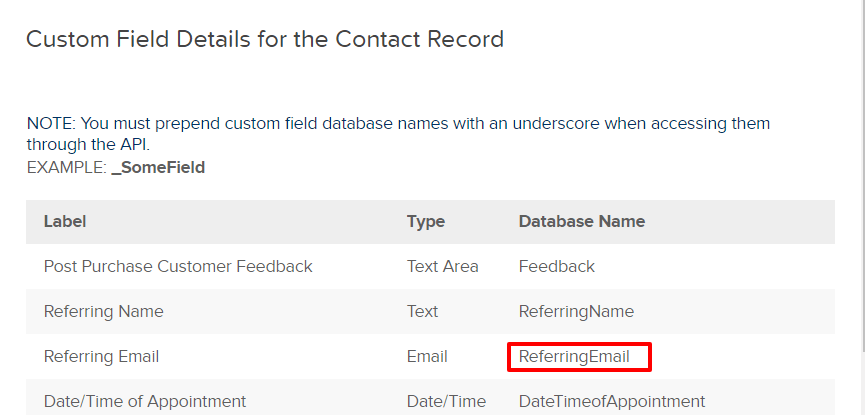

Use this database name to replace the “DatabaseName” in the HTML code provided above.
Replace the text “Your Custom Field” with the public label you want on this field. The label will fit inside the field and tell the contact what information you are looking for here.
Adding Keap Max Classic fields:
- The HTML code provided below is for adding an Keap Max Classic field (one that you did not create as a custom field) to an order form. You will need to update the highlighted section with the actual Keap Max Classic name of the field and a label you want to add to the order form.
Code for Adding Keap Max Classic Text Fields to Keap Max Classic Order Forms
Code for Adding Keap Max Classic Dropdown Fields to Keap Max Classic Order Forms
- To find the database name of a Keap Maz Classis field, navigate to any contact record.
- Locate the field you would like to include on your oder and right click the field to open and choose “Inspect” or press Ctrl+Shift+I. (This instruction will work in Chrome.)
- In the Elements screen, the Keap Max Classic Field name is the text in quotes following Name=(starts with “inf_field_”).

- Use this field name to replace InfusionsoftName in the code provided.
- Replace the “Your Infusionsoft Field” with the public label you want on this field. The label will fit inside the field and tell the contact what information you are looking for here.
Solution 2 (easier): 2-Step Checkout process with webform in front of an Keap Max Classic order form
Create a webform (or landing page with a form) that contacts will fill out before going to the order form. Set the Order Form up as the thank you page for the webform and pass the contact’s details.
Create your order form or have the link to the desired order form handy.
Create a webform with all the additional fields you are hoping to collect at the time of purchase.
Add the order form link as the Thank You Page URL and check “Pass contact's information to the thank-you page"
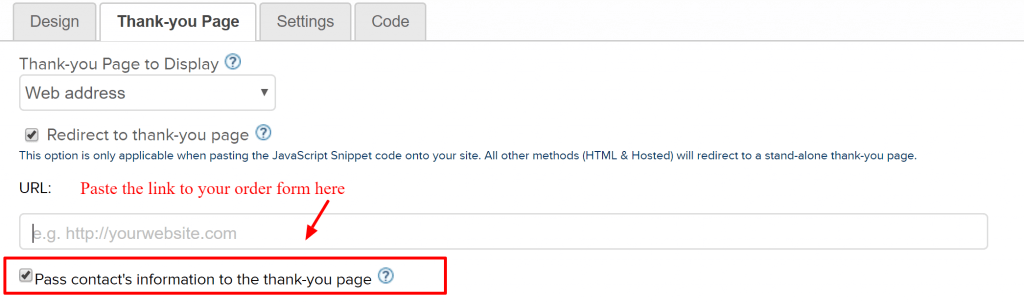

- Passing the contact’s information to the Thank You page will pre-fill the fields where information was already collected. (This way the contact won’t have to type their name and email address again).
- Connect the button on your sales page to load the webform or page with the webform first:
- You can embed this form on your website or connect the form to a pop-up (instructions for this step not included in this blog post)
- Or you can send them to a designed webform or Keap Max Classic landing page (legacy builder not the new builder, as the new builder does not currently support custom fields.)
- Once your contact has completed the initial form, they will be directed the order form that you set up as the “thank you” page.
- The information that you collected with the webform will be saved on their contact record for you to access as needed.

